How to Claim Your Business in ChatGPT

Claim your business in ChatGPT Business Hub
Open ChatGPT Business Hub, sign in on the web and search for your business. Select the matching listing or add your business if that option appears. Follow the verification method offered, then use the business overview to check your claim and complete any remaining identity checks.
We used SEO Rank Genius as the example in this walkthrough. Your screens may differ depending on whether ChatGPT already has a listing for your business and which verification methods it offers.
What you’ll need
- A ChatGPT account you’re authorised to use for the business.
- The business name, website and a short description of what you offer.
- Access to whoever manages your public DNS if you choose website verification.
- Your public contact details and, if relevant, your current delivery and returns policies.
| Stage | What you do |
|---|---|
| Find the right business | Open Business Hub, then select the matching listing or add an eligible business. |
| Prove your connection | Use the verification method offered for your listing. This walkthrough uses website DNS. |
| Complete the profile | Enter the category, description and relevant customer-facing details. |
| Check approval | Open the business overview and complete Persona identity verification when prompted. |
Step 1. Open Business Hub and find your business
Sign in to ChatGPT on the web and open Business Hub. Choose Add business or Get started, depending on the screen you see. Search for your business by name. If there are several matches, check the website and, where relevant, the location before choosing one. Confirm the ChatGPT account you’ll use to manage it.
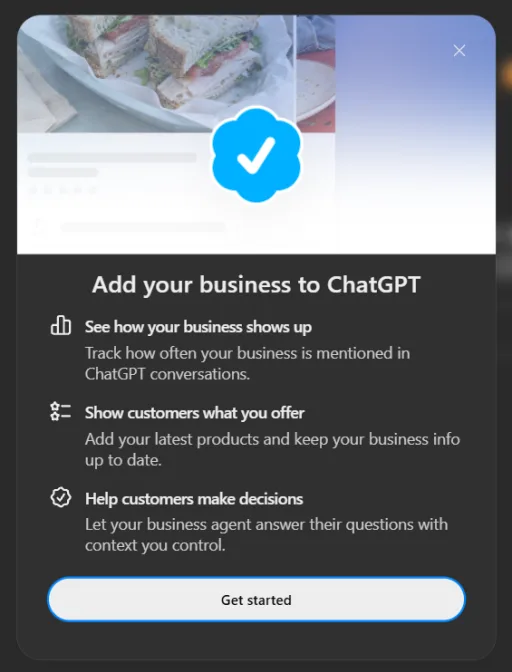
If you run an eligible online business and can’t find it, look for the option to add it. OpenAI currently limits local stores and restaurants to claiming existing US listings. If an existing listing shows Contact support, use that option to request access. If somebody has already claimed it, look for Dispute ownership in the listing’s menu and follow OpenAI’s instructions.
Step 2. Verify your website domain with a DNS TXT record
Choose Website domain if Business Hub offers it. This is the method we used for SEO Rank Genius. Keep the Business Hub tab open so you can copy the exact DNS record it gives you.
- Sign in to the service that hosts your domain’s public DNS. That might be your registrar, your web host or a provider such as Cloudflare.
- Open the DNS zone for the domain Business Hub is asking you to verify and add a new record.
- Enter the fields below using the exact values shown in Business Hub.
- Save the record. Once it is visible in public DNS, return to Business Hub and select Verify domain.
- Follow any remaining prompts. You can check progress from the business overview.
| DNS field | What to enter |
|---|---|
| Type | TXT |
| Name or host | The host shown in Business Hub. For the root domain, your provider may use @ or a blank field. |
| Value or content | Paste the full TXT value directly from Business Hub. Each claim has its own value. |
| TTL | Use your DNS provider’s default unless Business Hub specifies one. |
If the TXT record can’t be found
Check the published record with nslookup -type=TXT <record-hostname>, replacing the placeholder with the full hostname where the record should appear. If it’s missing, check that you edited the DNS zone served by the domain’s active nameservers and that your provider hasn’t appended the domain name twice. If it’s present, compare the entire value with Business Hub’s instructions and retry once the change has propagated. Add a separate TXT record so your existing email and verification records stay in place.
Business Hub can also offer verification by business phone, business email or Shopify. Use one of the methods shown for your profile. See OpenAI’s Business Hub setup guide.
Step 3. Choose your category and describe your business
Select the category that best describes your main business. Review any suggested categories and add one only if it accurately describes a meaningful part of what you offer. We selected Marketing agency for SEO Rank Genius.
The More about your business field is optional. A short description should tell a customer what you actually do. For example, “SEO Rank Genius provides technical SEO, generative engine optimisation, PPC and website design, and publishes guides for digital marketers.”

Step 4. Add public contact details
The phone and email fields shown in our setup are optional. If you fill them in, use contact details customers can actually reach. For a UK phone number, choose +44 in the country-code selector and check how the number is displayed. For email, a monitored enquiries inbox is a practical choice. Select Continue.

Step 5. Set your delivery policy
If you see the delivery screen, choose We don’t offer delivery, Paid delivery or Free delivery according to what customers can expect on your site. For a service business that ships no products, choose We don’t offer delivery. For a retailer, check the policy you show at checkout, including any free-delivery threshold. Select Continue.

Step 6. Check your returns policy and submit
If the returns screen appears, compare its options with the policy you already publish. The choices we saw were Returns not accepted, Returns accepted, with fees and Free returns. Select the accurate option and choose Submit. If none accurately describes your policy, pause and check the available options or ask support before submitting.

Step 7. Open the business overview and complete verification
Our confirmation screen said the profile had been saved as a draft. If you see the same message, choose Go to business overview to continue verification or check its status. OpenAI reviews claims and emails its decision or requests more information.

When prompted, complete the separate identity check with Persona. OpenAI may ask for ID, business registration details or evidence that you’re authorised to represent the business. Once approved, you can publish changes to business information and view available insights. The verified badge follows Persona approval. For a new profile created through Persona, OpenAI says approval can also publish that profile automatically. Review the details before continuing.
Claiming a business does not require an Ads account or a published Business Agent. Business Agents have separate eligibility criteria and are available to eligible US ecommerce and online service businesses at the time of writing. See OpenAI’s launch announcement and the Business Hub setup guide.
What to do after approval
Review the business name, website, category and customer-facing information in the overview. If you sell products, check whether you can connect your catalogue so OpenAI can receive pricing and availability updates. Keep the profile aligned with the details customers see on your site.
Open Insights once you have access. OpenAI describes a rolling 28-day view with mentions, website clicks and discovery topics where available. For an online business, a mention counts when ChatGPT references the website. A brand name on its own doesn’t count. A blank metric can reflect reporting thresholds, collection time or unavailable data.
For reporting, track Hub mentions and website clicks alongside GA4 sessions and conversions. One counts activity in ChatGPT and the other measures what your site records. Use the same reporting dates and keep both sources visible. See our guide to tracking AI traffic in GA4 and our guide to building brand authority in AI search.
For a closer look at these metrics, see our guide to the ChatGPT Business Hub dashboard. It uses our own dashboard to show how to read mentions, profile views, website clicks and discovery topics.
Frequently Asked Questions
Can I claim my business without a Shopify store?
Do I need a ChatGPT Ads account to claim my business?
Does verifying my domain mean my ChatGPT profile is live?
Why is my ChatGPT Business Hub Insights report blank?